
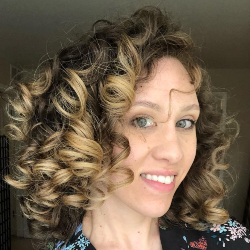
The Plump Method is a styling technique for people with naturally curly hair to create big, bouncy and fluffy curls. I have found that if I take my time with it on a wash day, I can achieve day 2/3/4 curls with a minimal-to-no refresh. My hair type is 2c/3a, but I’m sure these tips work for all kinds of curls, so keep reading!
My Curly Hair Experiments
Part of what worried me about going full-time curly is that I tend to get bored with my hair. I’m always chopping it off, growing it out, changing the color. I’ve been so pleased to learn that I can utilize different methods and techniques and have different curls because of it. Rake & shake, rake & scrunch, and the plump method all give significantly different results. Personally, I liked my curls on each of these wash days, but this is also proof to not give up on your curls if you aren’t happy with how they look. It may just be you haven’t stumbled upon the right hair technique for your curls.

The Plump Hair Method Tutorial
- Co-wash OR shampoo and conditioner of your choice
- Wide-tooth comb
- Styling product(s) of your choice – wax, gel, mousse, hair lotion, etc.
- T-shirt for plopping + hair tie
- Diffuser (optional)
- 10 minutes for washing and applying product/styling in shower
- 20 minutes for plopping
- Time to air dry or diffuse (varies from person to person, approx. 40 minutes)
Step 1: Co-Wash/Shampoo and Condition as Usual
With the co-wash, or conditioner, in your hair (whichever is your last step), flip your head over and gently finger-comb your hair so it is all going forward. Use a wide-tooth comb to distribute product evenly; this will also smooth your hair and prevent frizz.
Step 2: Form Curl Clumps, Apply Product, Finger Curl
With hair still flipped upside down, rinse the conditioner out of your hair. Let the water help your curls form into large clumps. Use your fingers to guide your hair, but let the water do most of the work! Optimally, you should have 6-8 large clumps. Those large clumps will help you get big fluffy curls once it is dry.
While still in the shower with hair still pushed forward, gently press the excess water out of your curl clumps. Your curls should still be soaking wet. Use a praying hands technique to apply your product(s). Now would be the time to apply a leave-in conditioner or hair balm, if you choose. Once your product is applied, finger curl each clump for more definition. Next, smoosh a small amount of gel into each curl clump.
Step 3: Time to Plop
Plopping your curls will help “set them” and will also help with volume. I’m so thankful to the first curly to come up with this method! I use a soft T-shirt; the key here is to let the curl clumps coil as you set them in the plop. I let my curls sit plopped in the T-shirt for about 20 minutes.
Step 4: Time to Dry
My preferred method is diffusing, however, you can air dry. I highly recommend diffusing, I find it gives me the best volume. Do NOT separate your curl clumps when they are still wet! Instead, gently move the curl clumps from side to side while you are drying. The curl clumps should start to separate on their own as you diffuse.
Step 5: Finishing Touches
Once my curls are about 80% to 90% dry, I start to pull apart any curls still clumped together. Optionally, you can do this with a small amount of your favorite oil on your hands. Once clumps are separated, continue to diffuse until dry.
Once your curls are 100% dry, use your fingers to gently shake your curls out at the roots. This will help with volume and also help lift curls from your scalp.
Troubleshooting
Throughout my curly hair journey, I’ve found answers to a lot of painful questions, so let me guess some difficulties you may run into and help you find the perfect solution to each!
Curls Are Not Large/Fluffy?
Make bigger curl clumps. You should have approximately 6-8 curl clumps. The larger the clump when wet, the larger the curl!
Undefined Curls in Back?
I use this method if I have an area of hair in the back that is undefined. Simply re-wet the section of hair you want to define, add a little more product of choice, if needed, then curl the hair around your finger. Once the hair is curled to your scalp, slide a bobby pin in to secure the curl to your scalp. Air dry or diffuse, and remove the bobby pin once fully dry.
Curls Stuck to Scalp?
Be sure to gently move the curl clumps from side to side as you are diffusing or air drying! Once curls are 100% dry, flip your head over and gently shake curls at the roots. This will help lift the hair off your scalp.
Follow me on Instagram @type_ofbeautiful for curl inspo, plus more tips and tricks. Feel free to DM me, if you ever have any questions; I love getting to know my curly friends!
Related Post: 7 Ways to Preserve Curly Hair Overnight


